Documenting your code
At the Python side documentation is available for both Python functions as well as Python wrapper C++ functions. The following sections describe how to add documentation for each of these types of functions.
Python modules
Documentation for the pycrtools is written with the aid of the sphinx package. The documentation consists of both static documentation such as the tutorial and these recipes and dynamically generated documentation such as the API documentation which is extracted directly from the docstrings in the code.
Within the code itself there are three levels of documentation.
- On the module level a block should contain at minimum a general description of the purpose of the module.
- If the module contains any classes they should have class level documentation describing the purpose of the class and an example of how it is supposed to be used.
- Each function or method should have a docstring describing the functions purpose, its output and its arguments.
For example:
"""This is an example module to illustrate documentation.
"""

class Test(object):
    """This is just a dummy class to illustrate class level
    documentation.

    If this was a real class more extensive documentation should be
    placed here.
    """

    def __init__(self, a, b):
        """Initializes the object.

        And its arguments:
        ========= ====================
        Parameter Description
        ========= ====================
        *a*       Does nothing
        *b*       Also does nothing
        ========= ====================
        """

def test(x, y):
    """This function does nothing.

    Really it does nothing.

    Arguments:
    ========= ====================
    Parameter Description
    ========= ====================
    *x*       Can be anything
    *y*       Can also be anything
    ========= ====================
    """
In order to format the documentation Sphinx uses reStructuredText, a wiki like syntax that is both human readable and machine parsable.
Basic markup
As in Python, indentation is significant in reST, so all lines of the same paragraph must be left-aligned to the same level of indentation. Paragraphs are simply chunks of text separated by one or more blank lines. The most frequently encountered errors when building the documentation are indentation errors so please take care of this.
Inline markup
The standard reST inline markup is quite simple: use
- one asterisk: *text* for emphasis (italics),
- two asterisks: **text** for strong emphasis (boldface), and
- backquotes: ``text`` for code samples.
If asterisks or backquotes appear in running text and could be confused with inline markup delimiters, they have to be escaped with a backslash.
Be aware of some restrictions of this markup:
- it may not be nested,
- content may not start or end with whitespace: * text* is wrong,
- it must be separated from surrounding text by non-word characters. Use a backslash escaped space to work around that: thisis\ *one*\ word.
reST also allows for custom “interpreted text roles”, which signify that the enclosed text should be interpreted in a specific way. Sphinx uses this to provide semantic markup and cross-referencing of identifiers. The general syntax is :rolename:`content`.
Examples are:
- :sub:`text` for subscript
- :sup:`text` for superscript
- :mod:`module` to refer to a module
- :class:`ClassName` to refer to a particular class
- :meth:`method` to refer to a method
- :func:`function` to refer to a function
Lists and Quote-like blocks
List markup is natural: just place an asterisk at the start of a paragraph and indent properly. The same goes for numbered lists; they can also be autonumbered using a # sign:
* This is a bulleted list.
* It has two items, the second
  item uses two lines.

1. This is a numbered list.
2. It has two items too.

#. This is a numbered list.
#. It has two items too.
Nested lists are possible, but be aware that they must be separated from the parent list items by blank lines:
* this is
* a list

  * with a nested list
  * and some subitems

* and here the parent list continues
Definition lists are created as follows:
term (up to a line of text)
   Definition of the term, which must be indented

   and can even consist of multiple paragraphs

next term
   Description.
Note that the term cannot have more than one line of text.
Quoted paragraphs are created by just indenting them more than the surrounding paragraphs.
Line blocks are a way of preserving line breaks:
| These lines are
| broken exactly like in
| the source file.
Source Code
Literal code blocks are introduced by ending a paragraph with the special marker ::. The literal block must be indented (and, like all paragraphs, separated from the surrounding ones by blank lines):
This is a normal text paragraph. The next paragraph is a code sample::

   It is not processed in any way, except
   that the indentation is removed.

   It can span multiple lines.
This is a normal text paragraph again.
The handling of the :: marker is smart:
- If it occurs as a paragraph of its own, that paragraph is completely left out of the document.
- If it is preceded by whitespace, the marker is removed.
- If it is preceded by non-whitespace, the marker is replaced by a single colon.
That way, the second sentence in the above example’s first paragraph would be rendered as “The next paragraph is a code sample:”.
Doctest blocks
Doctests are a way to include unit tests in Python. They are created by simply putting the input and output of the interactive Python session (regular interpreter not IPython) into the docstring. When running doctests on a module these code samples are executed and the output is compared to the actual output and the test passes if they are identical. To ensure doctests get the proper markup they should be placed in a .. doctest:: directive:
def add(a, b):
    """Adds two numbers.

    .. doctest::

        >>> add(1,2)
        3

    """

    return a + b
Tables
Two forms of tables are supported. For grid tables, you have to “paint” the cell grid yourself. They look like this:
+------------------------+------------+----------+----------+
| Header row, column 1   | Header 2   | Header 3 | Header 4 |
| (header rows optional) |            |          |          |
+========================+============+==========+==========+
| body row 1, column 1   | column 2   | column 3 | column 4 |
+------------------------+------------+----------+----------+
| body row 2             | ...        | ...      |          |
+------------------------+------------+----------+----------+
Simple tables are easier to write, but limited: they must contain more than one row, and the first column cannot contain multiple lines. They look like this:
=====  =====  =======
A      B      A and B
=====  =====  =======
False  False  False
True   False  False
False  True   False
True   True   True
=====  =====  =======
Hyperlinks
External links
Use `Link text <http://example.com/>`_ for inline web links. If the link text should be the web address, you don’t need special markup at all, the parser finds links and mail addresses in ordinary text.
You can also separate the link and the target definition, like this:
This is a paragraph that contains `a link`_.

.. _a link: http://example.com/
Internal links
Internal linking is done via a special reST role provided by Sphinx. To reference modules, classes, methods and functions use the :mod:, :class:, :meth: and :func: directives as discussed above.
Cross-references are generated by many semantic interpreted text roles. Basically, you only need to write :role:`target`, and a link will be created to the item named target of the type indicated by role. The links’s text will be the same as target.
There are some additional facilities, however, that make cross-referencing roles more versatile:
- You may supply an explicit title and reference target, like in reST direct hyperlinks: :role:`title <target>` will refer to target, but the link text will be title.
- If you prefix the content with !, no reference/hyperlink will be created.
- If you prefix the content with ~, the link text will only be the last component of the target. For example, :meth:`~Queue.Queue.get` will refer to Queue.Queue.get but only display get as the link text.
- In HTML output, the link’s title attribute (that is e.g. shown as a tool-tip on mouse-hover) will always be the full target name.
To support cross-referencing to arbitrary locations in any document, the standard reST labels are used. For this to work label names must be unique throughout the entire documentation.
If you place a label directly before a section title, you can reference to it with :ref:`label-name`. Example:
.. _my-reference-label:

Section to cross-reference
--------------------------

This is the text of the section.

It refers to the section itself, see :ref:`my-reference-label`.
The :ref: role would then generate a link to the section, with the link title being “Section to cross-reference”. This works just as well when section and reference are in different source files.
Sections
Section headers (ref) are created by underlining (and optionally overlining) the section title with a punctuation character, at least as long as the text:
=================
This is a heading
=================
Normally, there are no heading levels assigned to certain characters as the structure is determined from the succession of headings. However, for the Python documentation, this convention is used which we follow:
- # with overline, for parts
- * with overline, for chapters
- =, for sections
- -, for subsections
- ^, for subsubsections
- ", for paragraphs
Of course, you are free to use your own marker characters (see the reST documentation), and use a deeper nesting level, but keep in mind that most target formats (HTML, LaTeX) have a limited supported nesting depth.
Footnotes
For footnotes, use [#name]_ to mark the footnote location, and add the footnote body at the bottom of the document after a “Footnotes” rubric heading, like so:
Lorem ipsum [#f1]_ dolor sit amet ... [#f2]_

.. rubric:: Footnotes

.. [#f1] Text of the first footnote.
.. [#f2] Text of the second footnote.
You can also explicitly number the footnotes ([1]_) or use auto-numbered footnotes without names ([#]_).
Citations
Standard reST citations are supported, with the additional feature that they are “global”, i.e. all citations can be referenced from all files. Use them like so:
Lorem ipsum [Ref]_ dolor sit amet.

.. [Ref] Book or article reference, URL or whatever.
Citation usage is similar to footnote usage, but with a label that is not numeric or begins with #.
Notes and warnings
To add notes and warnings to the documentation we have to use the special reST syntax for explicit directives .. directive:: content.
For example:
.. note:: This is a simple note.

.. warning:: Expect strange things to happen.
will be rendered as:
Note
This is a simple note.
Warning
Expect strange things to happen.
Author information
In principle every module should have author information. Prefarably place them as the last entry in the module documentation block. There can be more then one author. Example:
"""This module is used to do something.

.. moduleauthor:: John Doe <john.doe@example.com>
.. moduleauthor:: Hello World <hello.world@example.com>
"""
Images
reST supports an image directive, used like so:
.. image:: gnu.png
   (options)
When used within Sphinx, the file name given (here gnu.png) must either be relative to the source file, or absolute which means that they are relative to the top source directory. For example, the file sketch/spam.rst could refer to the image images/spam.png as ../images/spam.png or /images/spam.png.
Sphinx will automatically copy image files over to a subdirectory of the output directory on building (e.g. the _static directory for HTML output.)
Interpretation of image size options (width and height) is as follows: if the size has no unit or the unit is pixels, the given size will only be respected for output channels that support pixels (i.e. not in LaTeX output). Other units (like pt for points) will be used for HTML and LaTeX output.
Sphinx extends the standard docutils behavior by allowing an asterisk for the extension:
.. image:: gnu.*
Sphinx then searches for all images matching the provided pattern and determines their type. Each builder then chooses the best image out of these candidates. For instance, if the file name gnu.* was given and two files gnu.pdf and gnu.png existed in the source tree, the LaTeX builder would choose the former, while the HTML builder would prefer the latter.
Math
For inline math use:
Since Pythagoras, we know that :math:`a^2 + b^2 = c^2`.
which is rendered to a png image as follows:
Since Pythagoras, we know that  .
.
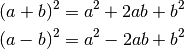
For multiple equations, which should be separated by a blank line use the .. math:: directive:
.. math::

   (a + b)^2 = a^2 + 2ab + b^2

   (a - b)^2 = a^2 - 2ab + b^2
which renders as follows.
In addition, each single equation is set within a split environment, which means that you can have multiple aligned lines in an equation, aligned at & and separated by \\:
.. math::

   (a + b)^2  &=  (a + b)(a + b) \\
              &=  a^2 + 2ab + b^2
to give.

Finally equations can be cross-referenced via their label. This currently works only within the same document. Example:
.. math:: e^{i\pi} + 1 = 0
   :label: euler

Euler's identity, equation :eq:`euler`, was elected one of the most
beautiful mathematical formulas.
(1)
Euler’s identity, equation (1), was elected one of the most beautiful mathematical formulas.
Documentation layout
The typical layout of the documentation for a Python function should look like the following:
"""
A brief summary of the function.

**Parameters**

  =========== ============================================================
  *param_1*   Description.
  *param_2*   Description.
  =========== ============================================================

**Description**

A longer description of the functionality.

**Usage**

  ``func(param_1, param_2) -> return value of the function``

**See also**

:func:`other_func_1`, :func:`other_func_2`

**Example**
::

  >>> Example of how to use the function.

"""
Resulting in:
A brief summary of the function.
Parameters
param_1 Description. param_2 Description. Description
A longer description of the functionality.
Usage
func(param_1, param_2) -> return value of the functionSee also
other_func_1(), other_func_2()
Example
>>> Example of how to use the function.
Low level C++ routines
This section describes how to add/modify the documentation for the low level C++ routines that add functionality to the Python layer (i.e only for wrapped functions). As these functions are wrapped and exposed to Python, the documentation of these functions should, like for Python functions, be done in a style that can be interpreted by the Sphinx documentation generator, which is described in Python modules. Furthermore, being C++ functions, there is also documentation information needed by the Doxygen documentation generator that is used for the C++ documentation.
A typical documentation for a C++ function is of the following form:
//$DOCSTRING: Summary of the function
//$COPY_TO HFILE START ---------------------------------------------------
...
//$COPY_TO END -----------------------------------------------------------
/*!
  \brief $DOCSTRING
  $PARDOCSTRING
   ...
*/
where the first ellipsis (...) contains the wrapper definitions and the second ellipsis located between /*! and */ the documentation of the function.
The lines containing \brief $DOCSTRING and $PARDOCSTRING are only used for Doxygen and are ignored in the Python documentation generation process.
Basics
Most important (and essential) are the function summary and parameter description.
The function summary is obtained from the $DOCSTRING parameter of the wrapper definition, e.g.
//$DOCSTRING: Summary of the function
which is used in the function definition, e.g.
#define HFPP_FUNCDEF (HFPP_VOID)(HFPP_FUNC_NAME)("$DOCSTRING")(HFPP_PAR_IS_SCALAR)()(HFPP_PASS_AS_VALUE)
The names and descriptions of the function parameters are also obtained from the wrapper definition, e.g.
#define HFPP_PARDEF_0 (HNumber)(vec)()("Parameter description")(HFPP_PAR_IS_VECTOR)(STDIT)(HFPP_PASS_AS_REFERENCE)
Both function summary and parameter description should be formatted in a string that can be parsed by Sphinx.
Additional documentation
It is often good to have a more elaborate description of the functionality of a function, a reference to related functions or an example of how to use the function. Therefore, additional documentation can be added by placing them under one of the following sections titles:
- Description
- See also
- Examples
A section is started by specifying the aforementioned section name followed by a colon, e.g.
Description:
All lines following are added to this specific section until a new section is declared or the until end of the end of the comment block is reached (as specified by */). When multiple sections of the same type declared, their content is merged into one section.
The order in which the sections are written in the code is not relevant. When the documentation is generated the sections are Description, Reference, and Examples.
Description
A more in depth description of the function should be placed under the section of type Description All text within the description section should be typeset using the Sphinx syntax as is described in Python modules.
/*

  Description:
  This is the 1:sup:`st` description line.
  This is the 2:sup:`nd` description line.

*/
References
This contains a comma or new line separated list of function names. Instead of the section type Reference it is also allowed to use References or See also, e.g.
/*!

  See also:
  functionName1, functionName2, functionName3

*/
Each function name will be converted into a link to the corresponding function when the documentation is generated.
Example
Examples of the code usage should be placed in the Example section. As the functions are available in Python the examples are typeset as code using Python syntax highlighting. For proper highlighting use >>> as a prefix for Python code and ... as a prefix for code continuation for multiple line commands. Results from the Python code do not have a prefix.
/*!

  Example:
  >>> vec = Vector([1.,2.,4.])
  >>> for i in range(len(vec)):
  ...     print vec[i]
  1.
  2.
  4.

*/
Documentation example
A typical example of the function documentation is shown below:
/*!
  \brief $DOCSTRING
  $PARDOCSTRING

  Description:
  This is a more extended version of the documentation hDivSelf.

  See also:
  hMulSelf, hDivSelf, hSubSelf, hAddSelf, hInverse

  Example:
  >>> vec = Vector([1.,2.,4.])
  >>> vec.divself(1)
  [1.0,0.5,0.25]
 */